
基于Elog的 Notion-hexo 同步方案
博客工具
- 写作平台:Notion
- 博客平台:Hexo
- 博客主题:Butterfly
- 博客文档同步:Elog
- 原项目仓库:https://github.com/elog-x/notion-hexo
博客搭建指南
Fork模板仓库
将模板仓库 clone 到本地
之前已经有博客的情况
使用旧博客文件覆盖博客仓库
修改
package.json中的依赖:1
2
3
4
5
6
7
8
9
10
11
12
13
14
15
16
17
18
19
20
21
22
23
24
25
26
27
28
29
30
31
32
33
34
35
36
37
38
39
40
41
42
43
44
45
46
47
48
49{
"name": "hexo-site",
"version": "0.0.0",
"private": true,
"scripts": {
"build": "hexo generate",
"clean": "hexo clean",
"deploy": "hexo deploy",
+ "server": "hexo clean && hexo server",
+ "sync:local": "elog sync -e .elog.env",
+ "elog:init": "elog init",
+ "sync": "elog sync",
+ "elog:clean": "elog clean"
},
"hexo": {
"version": "7.3.0"
},
"dependencies": {
+ "@elog/cli": "^0.14.0",
"hexo": "^7.0.0",
"hexo-abbrlink": "^2.2.1",
"hexo-bilibili-bangumi": "^1.10.8",
"hexo-butterfly-categories-card": "^1.0.0",
"hexo-butterfly-clock-anzhiyu": "^1.1.8",
"hexo-butterfly-envelope": "^1.0.15",
"hexo-butterfly-footer-beautify": "^1.0.6",
"hexo-butterfly-tag-plugins-plus": "^1.0.18",
"hexo-butterfly-wowjs": "^1.0.5",
"hexo-deployer-git": "^4.0.0",
"hexo-generator-archive": "^2.0.0",
"hexo-generator-category": "^2.0.0",
"hexo-generator-feed": "^3.0.0",
"hexo-generator-index": "^3.0.0",
"hexo-generator-search": "^2.4.3",
"hexo-generator-sitemap": "^3.0.1",
"hexo-generator-tag": "^2.0.0",
"hexo-renderer-ejs": "^2.0.0",
"hexo-renderer-kramed": "^0.1.4",
+ "hexo-renderer-marked": "^6.0.0",
"hexo-renderer-pug": "^3.0.0",
"hexo-renderer-stylus": "^3.0.1",
"hexo-server": "^3.0.0",
"hexo-tag-aplayer": "^3.0.4",
"hexo-theme-landscape": "^1.0.0"
},
"devDependencies": {
"hexo-generator-baidu-sitemap": "^0.1.9"
}
}继续后续操作
安装依赖
在项目根目录下运行命令安装依赖
1 | npm install |
新建 Elog 本地调试文件
- 将
.elog.example.env文件重命名为.elog.env,此文件将用于本地同步Notion 文档
配置 Notion 关键信息
配置流程
- 使用 Database 模板 创建数据库副本或增加必要属性到已有 Notion 数据库
- 博客平台为Hexo时,可参考elog-hexo-template 创建数据库副本或增加必要属性到已有 Notion 数据库
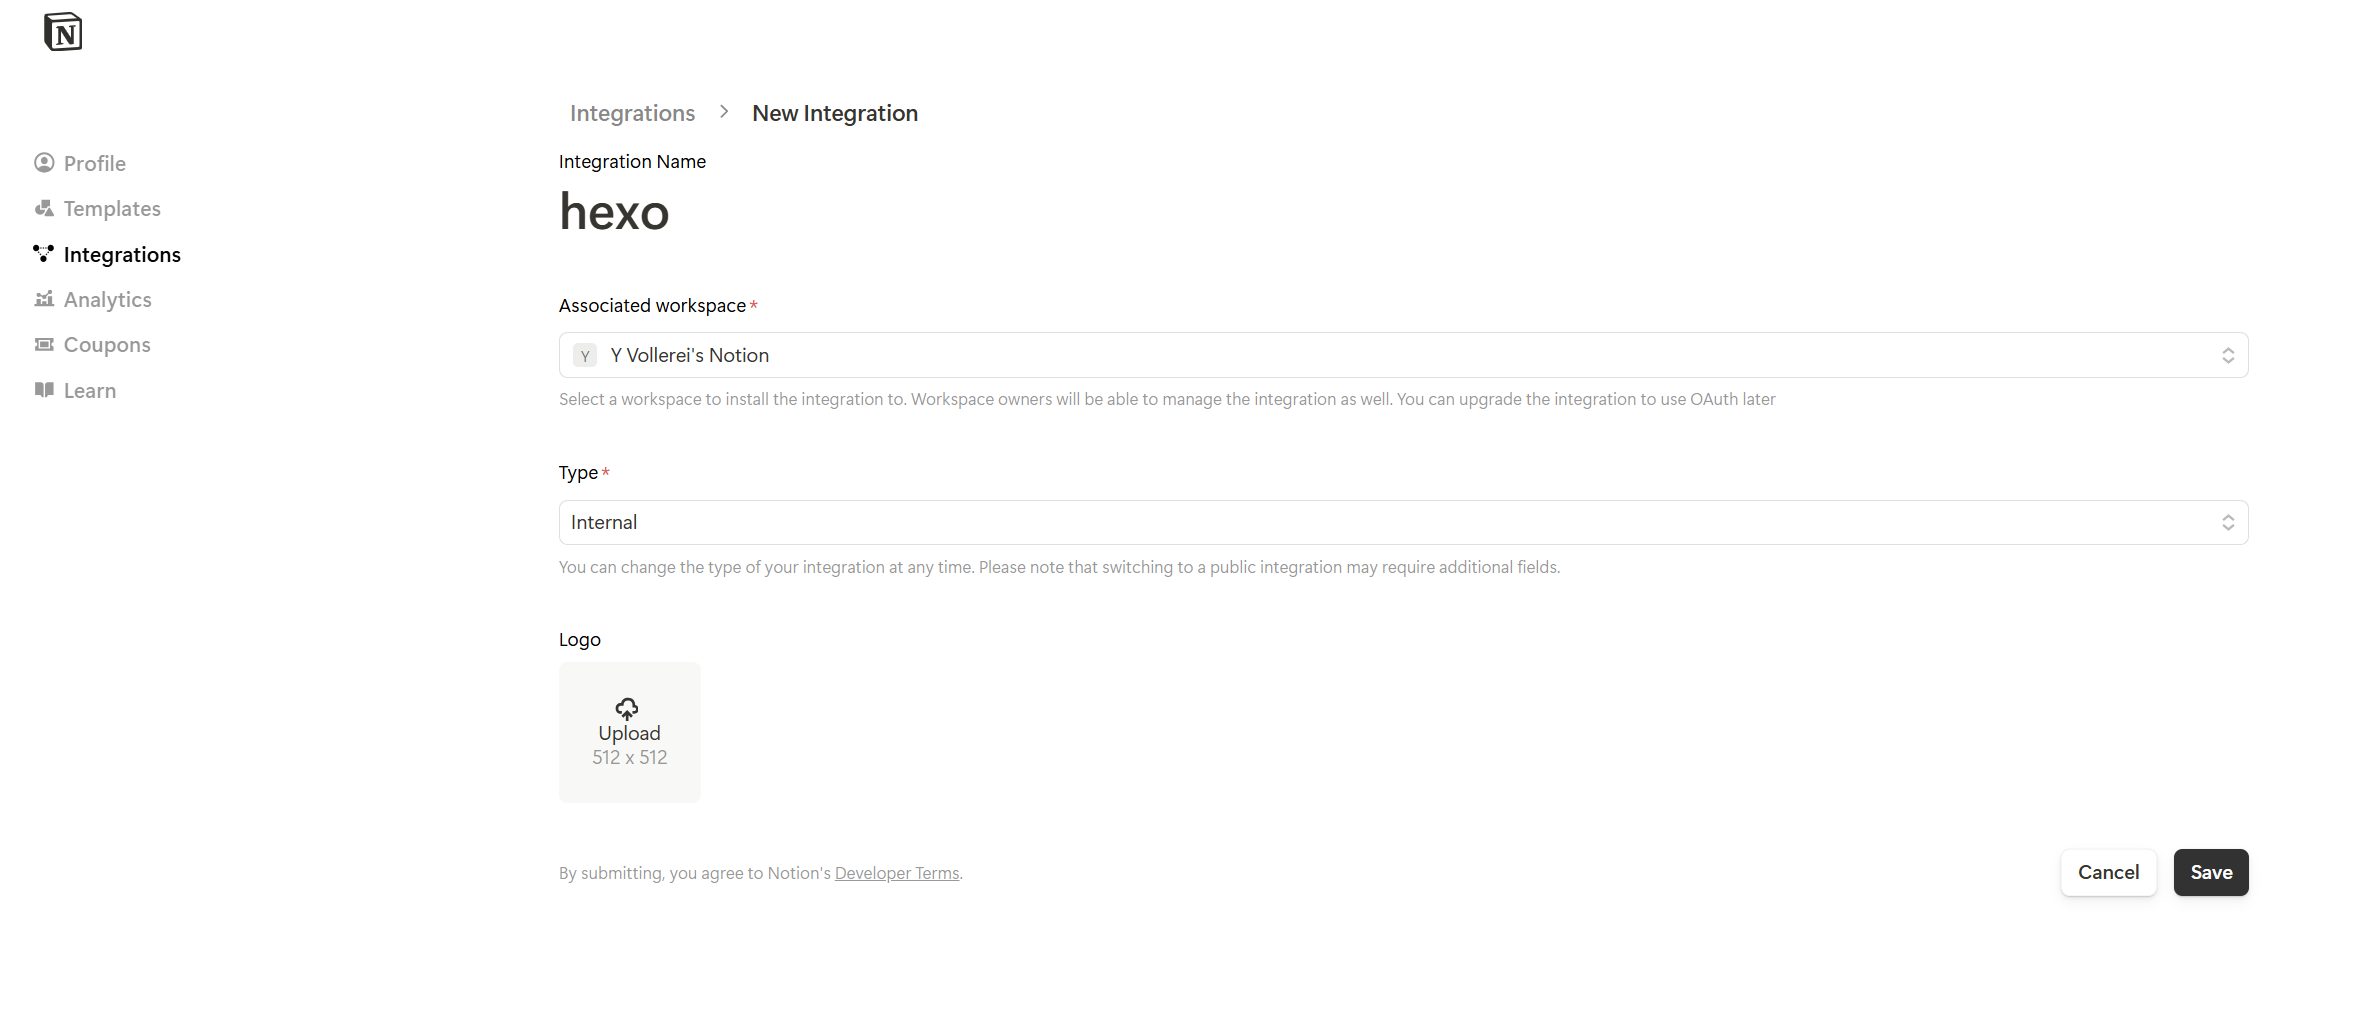
- 创建 Integration Token,具体请参考 Notion 官方教程
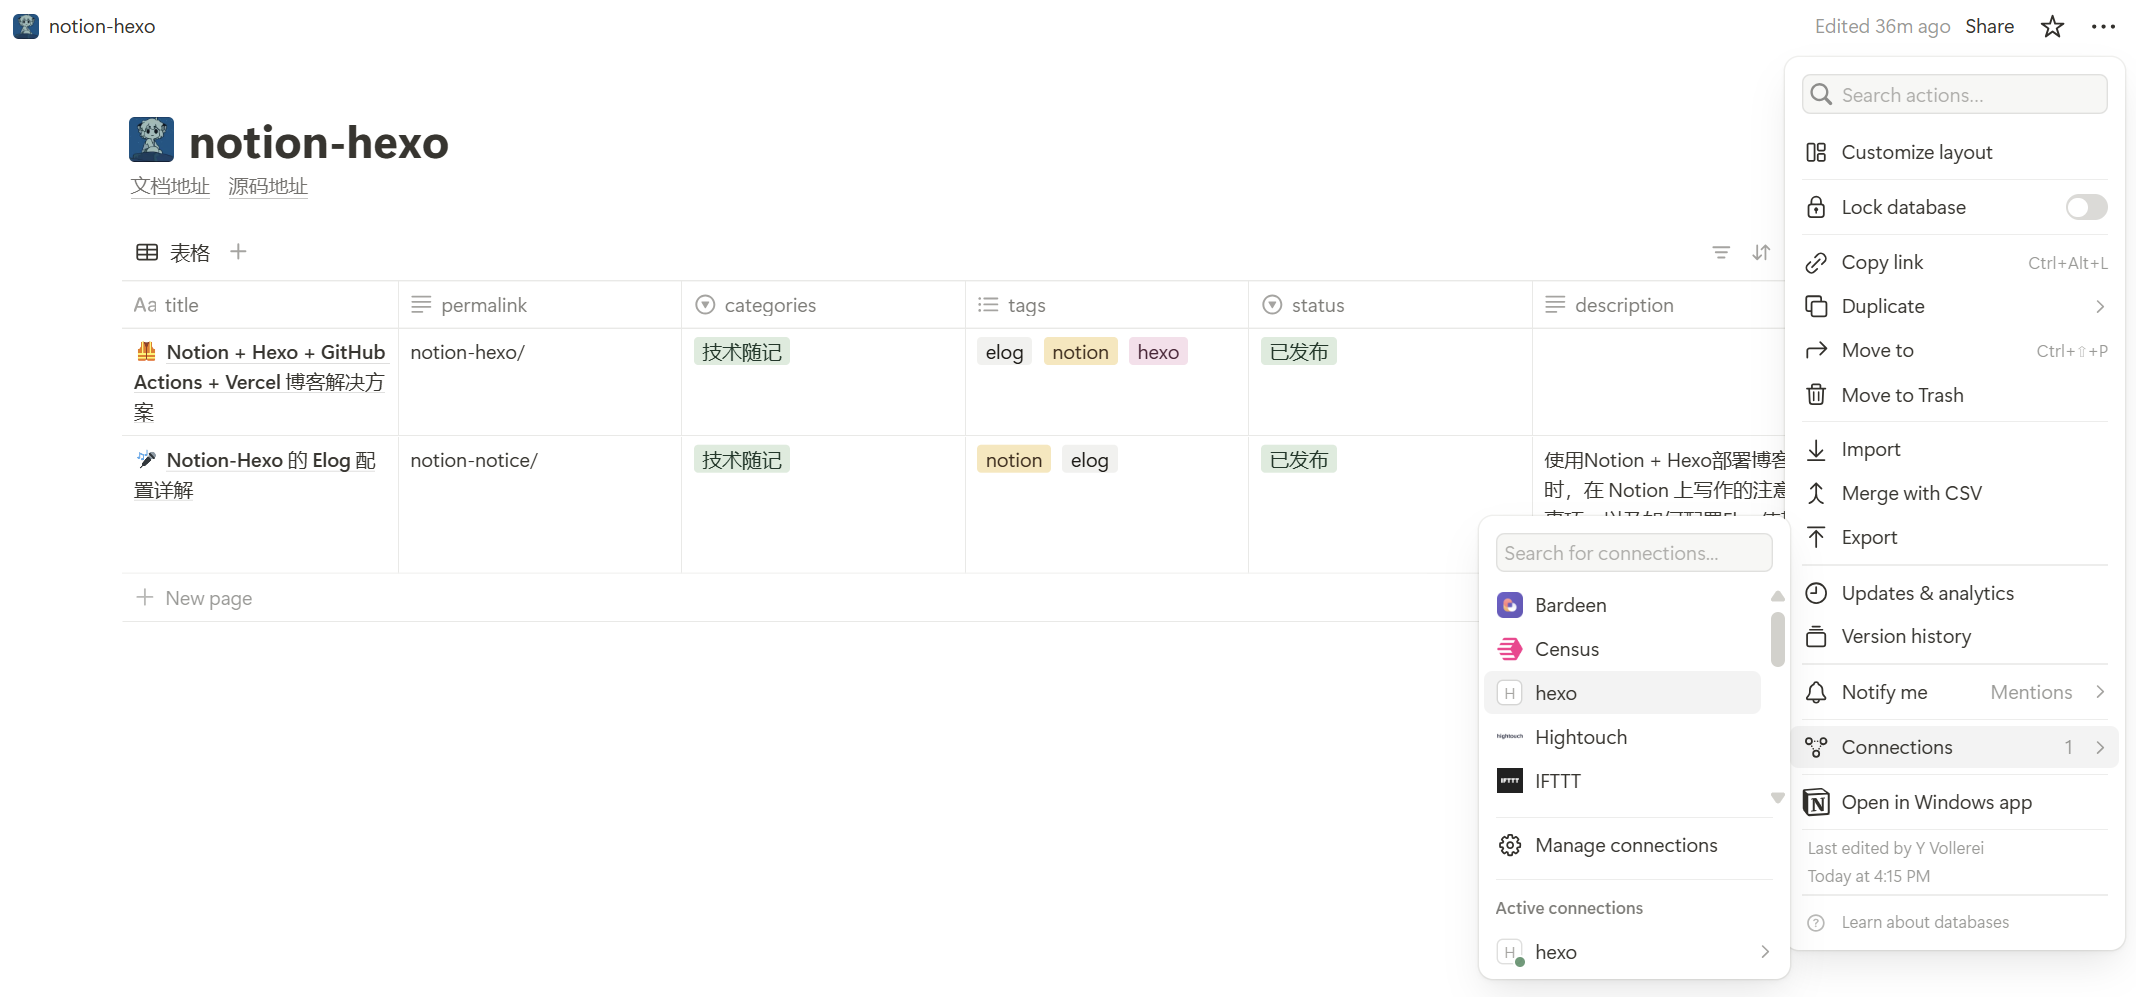
- 将复制的数据库连接到刚创建的 Integration,具体请参考 Notion 官方教程
- 获取数据库 DatabaseId
按照文档提示配置 Notion 并获取 token 和 databaseId,在本地.elog.env中写入
1 | NOTION_TOKEN=获取的token |
配置Notion Database
示例:
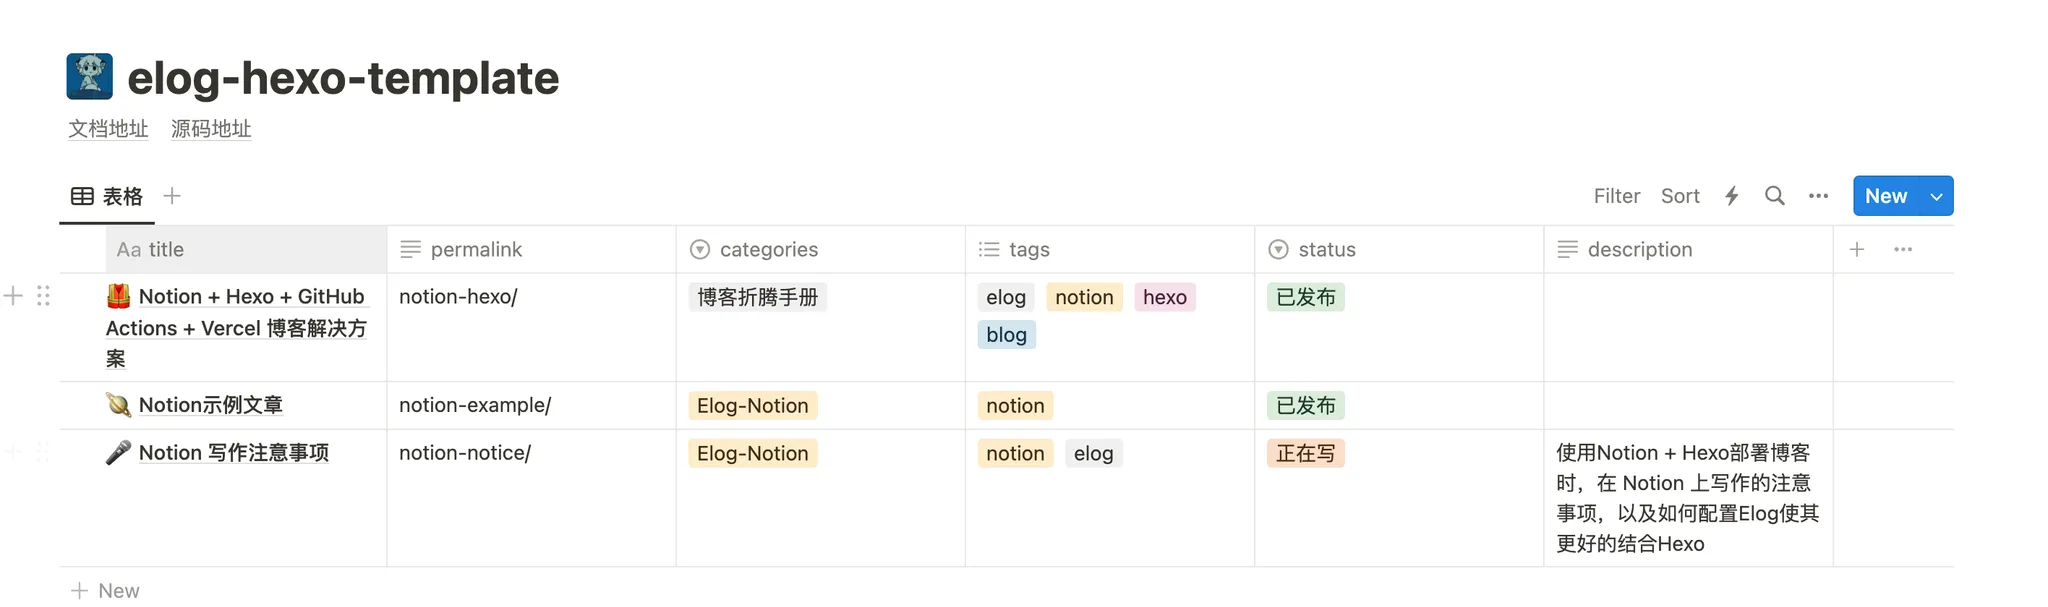
Database字段:
permalink为文档的永久链接,例如https://notion-hexo.vercel.app/notion-hexo/,注意记得在结尾加上/categories为文档的分类tags为文档的标签description为主题配置中可选的文档描述
获取token
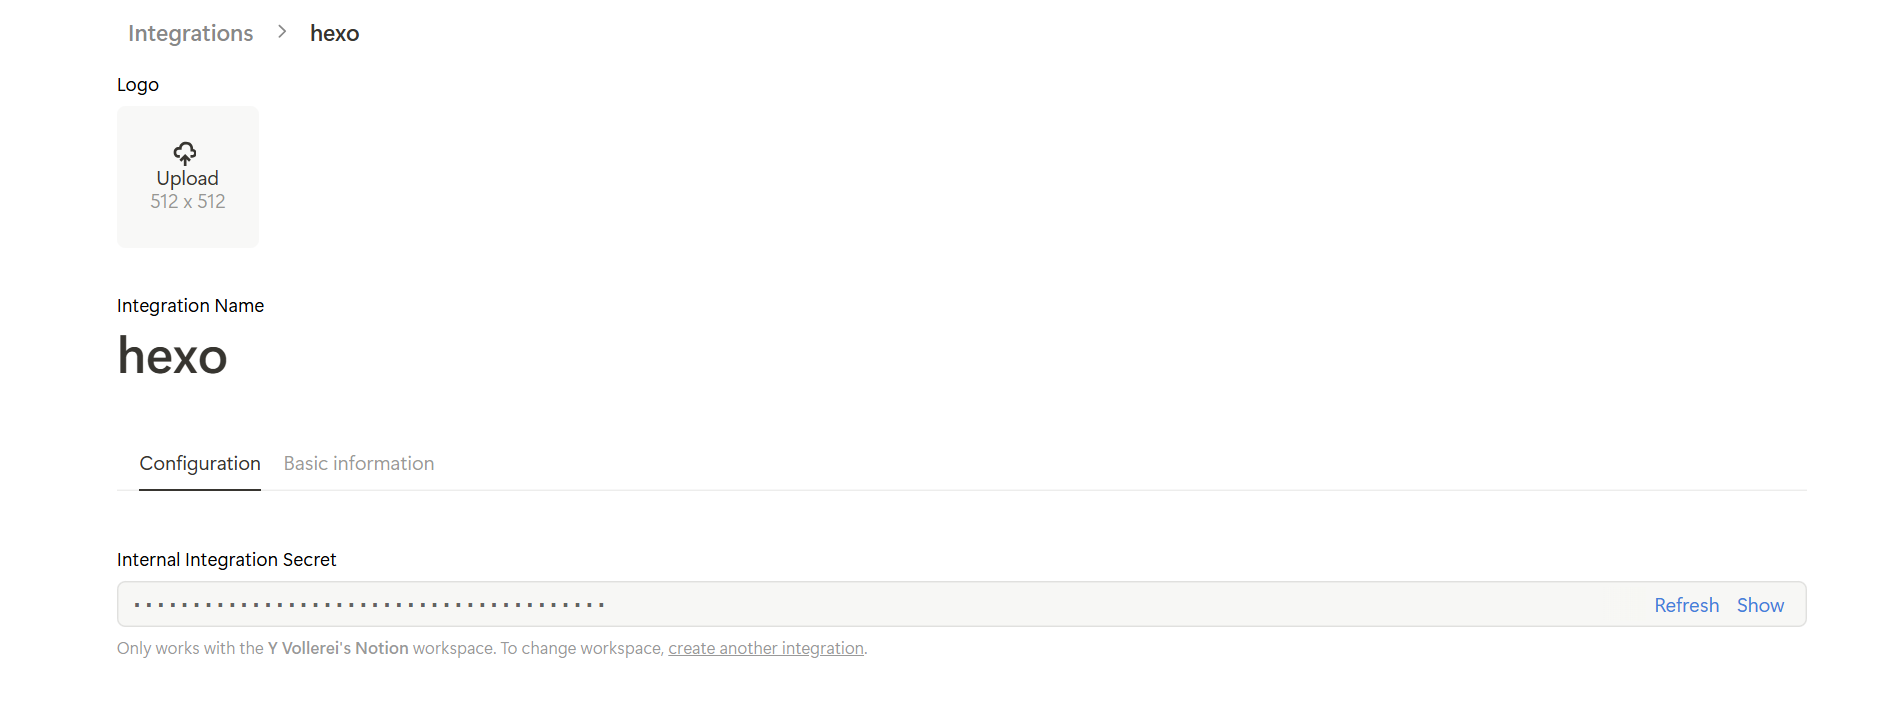
登录Notion 网页版 =>访问My integrations =>New Integration => 生成 Internal Integration Token

Internal Intergration Secret即为token
在使用的Notion Database页面点击右上角设置→Connections,选择刚才创建的Integration
其他注意事项:
- notion文章必须有封面(cover),否则同步会失败
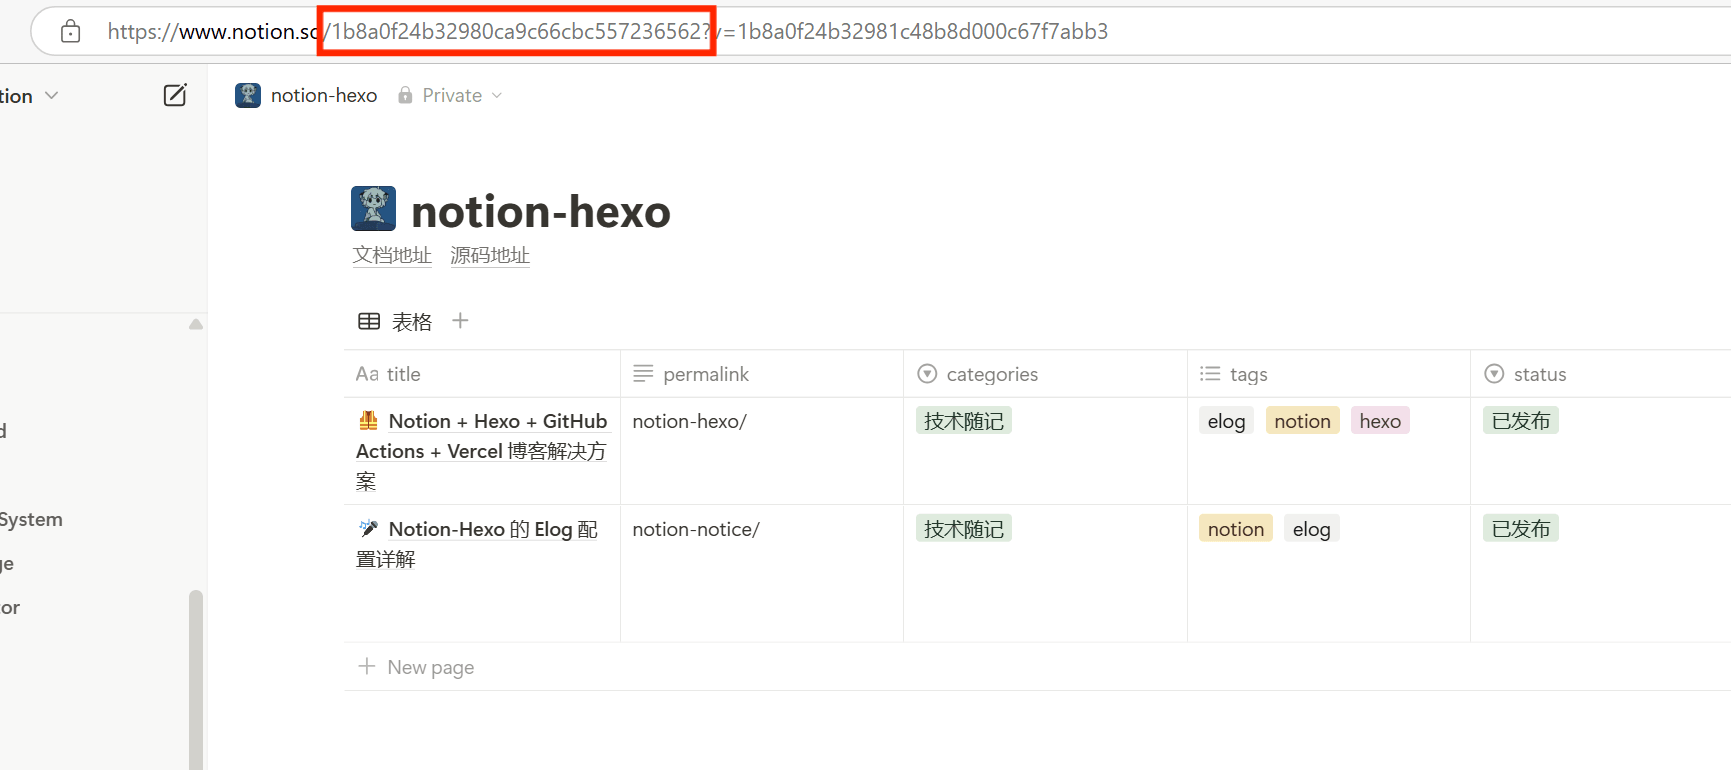
获取DatabaseId
图中url中红框部分(1b8a0f24b32980ca9c66cbc557236562)即为DatabaseId
本地调试
在项目根目录运行同步命令,Notion Database中的文章就会被全部同步值本地
1 | npm run sync:local |
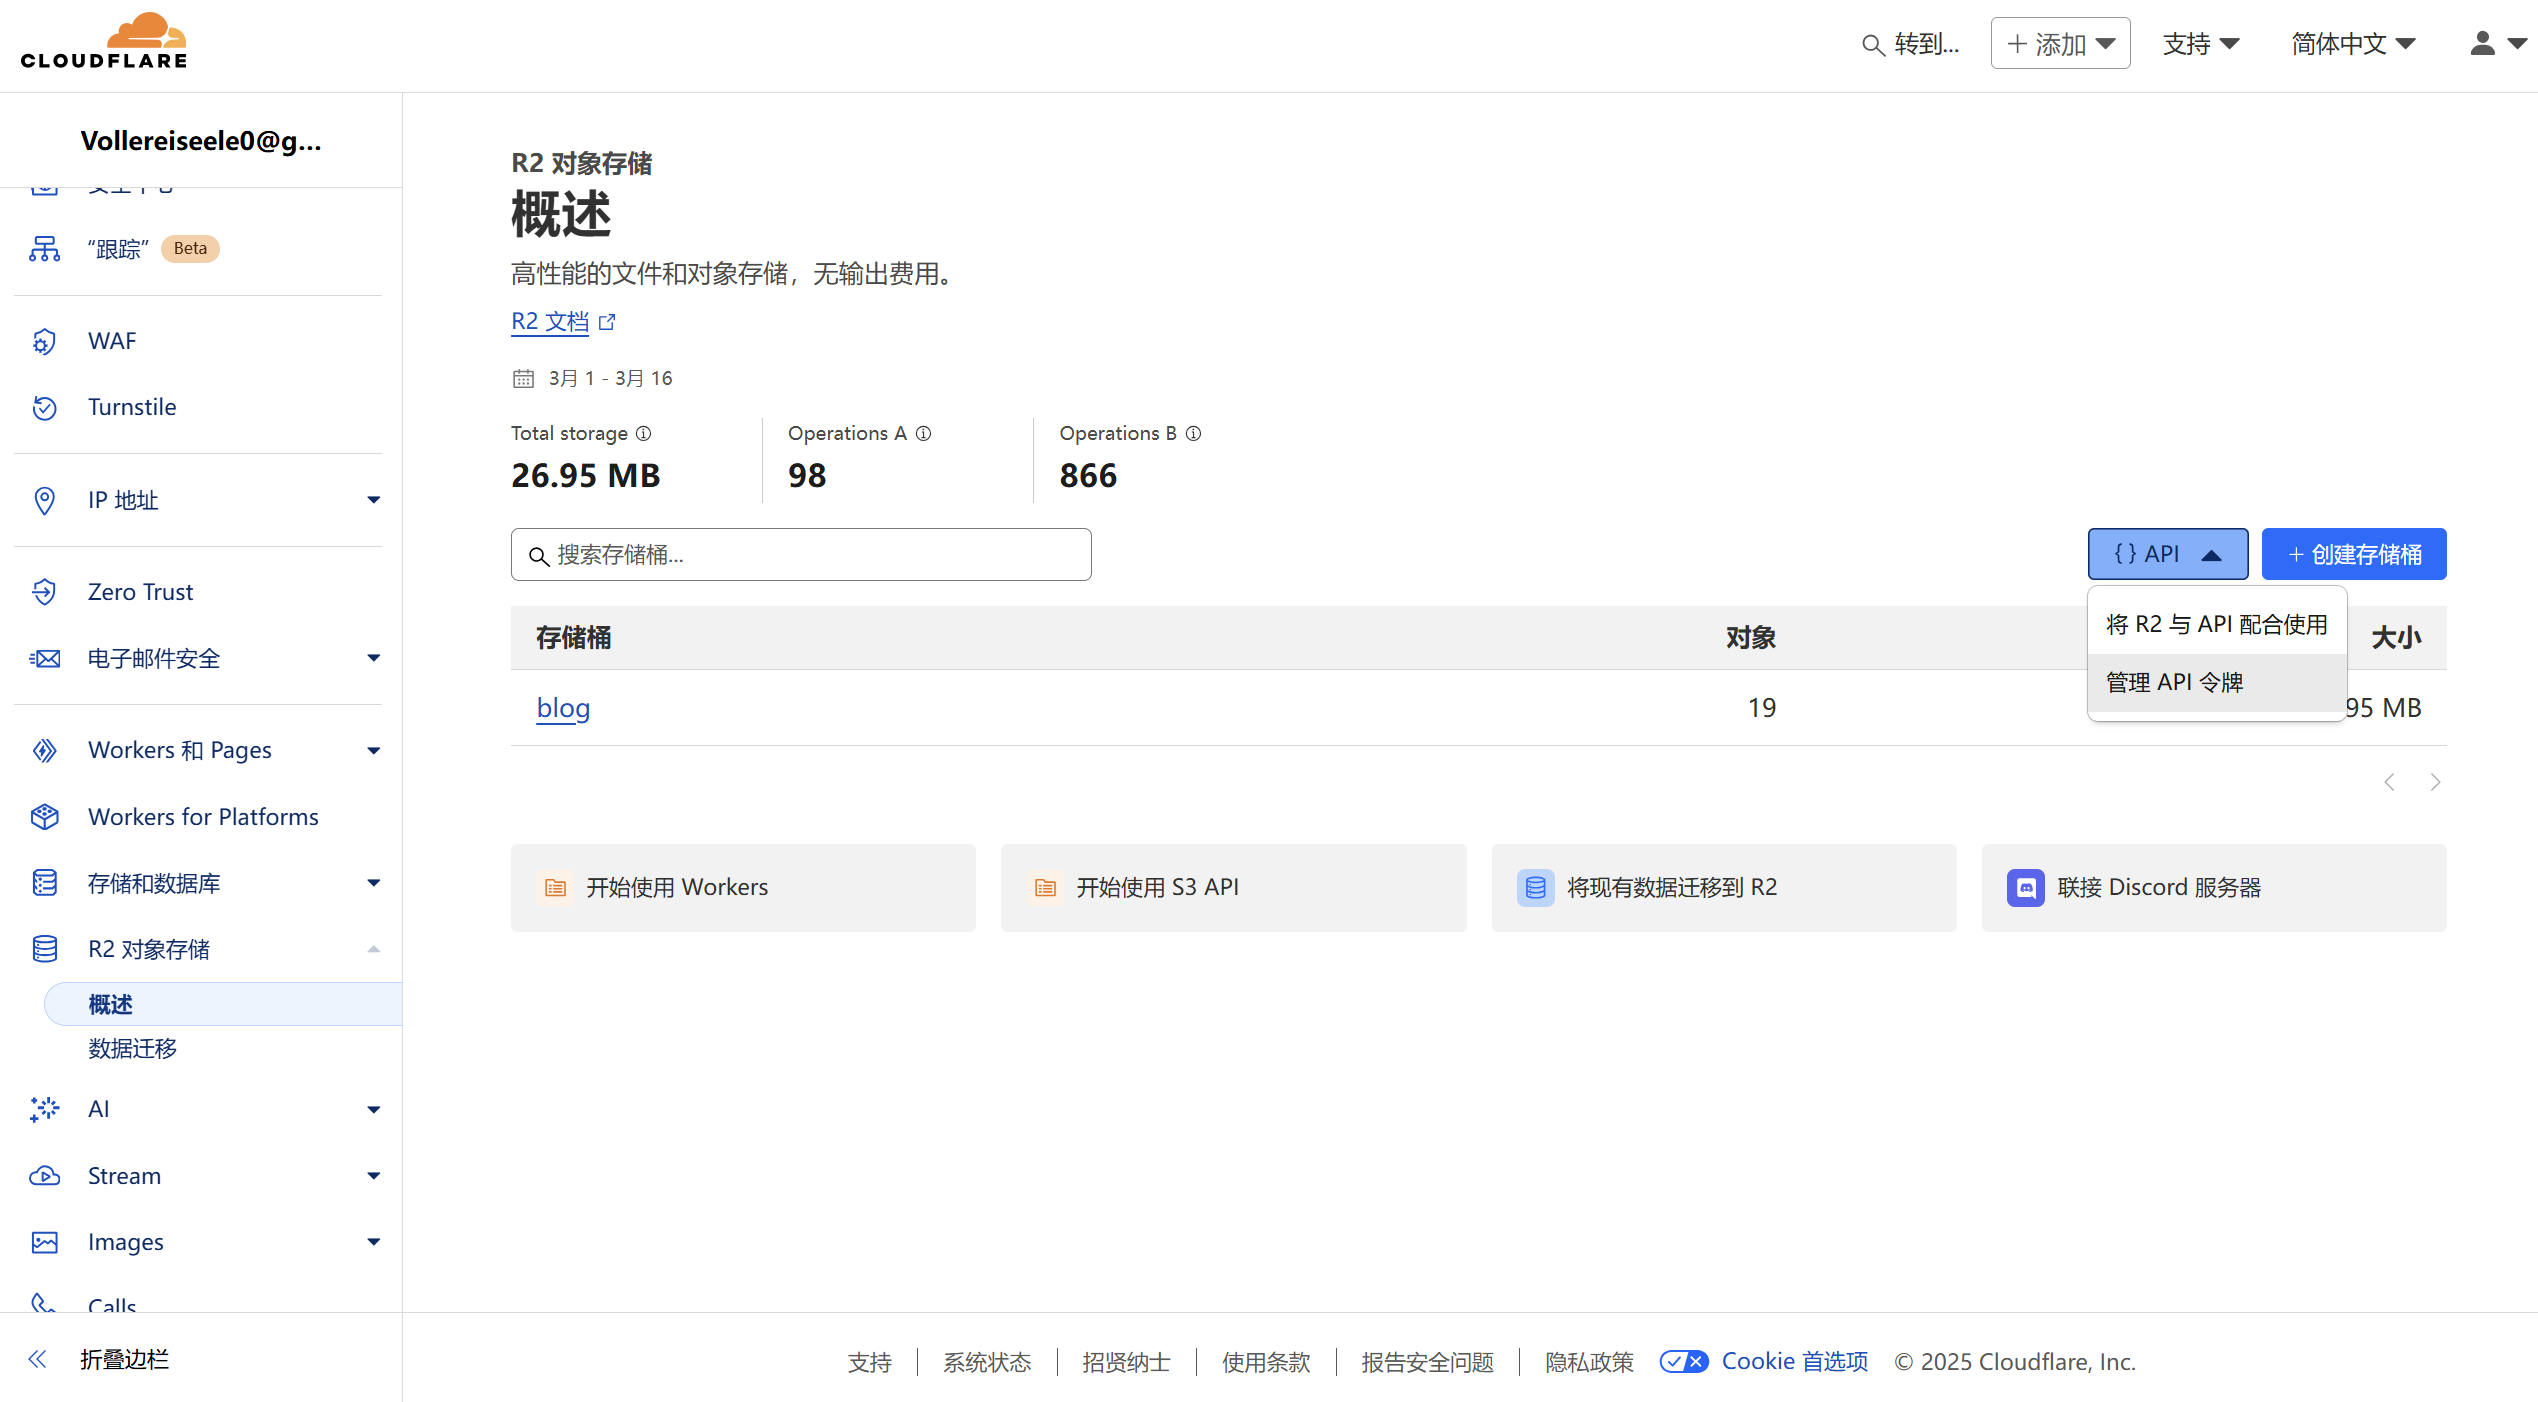
Elog配置CloudFlare R2图床
安装插件
1 | npm install @elog/plugin-img-r2 |
配置 elog.config.js
1 | // elog.config.js |
配置 .elog.env文件
在 .elog.env 中插入以下信息
1 | # .elog.env 配置R2 相关账号参数 |
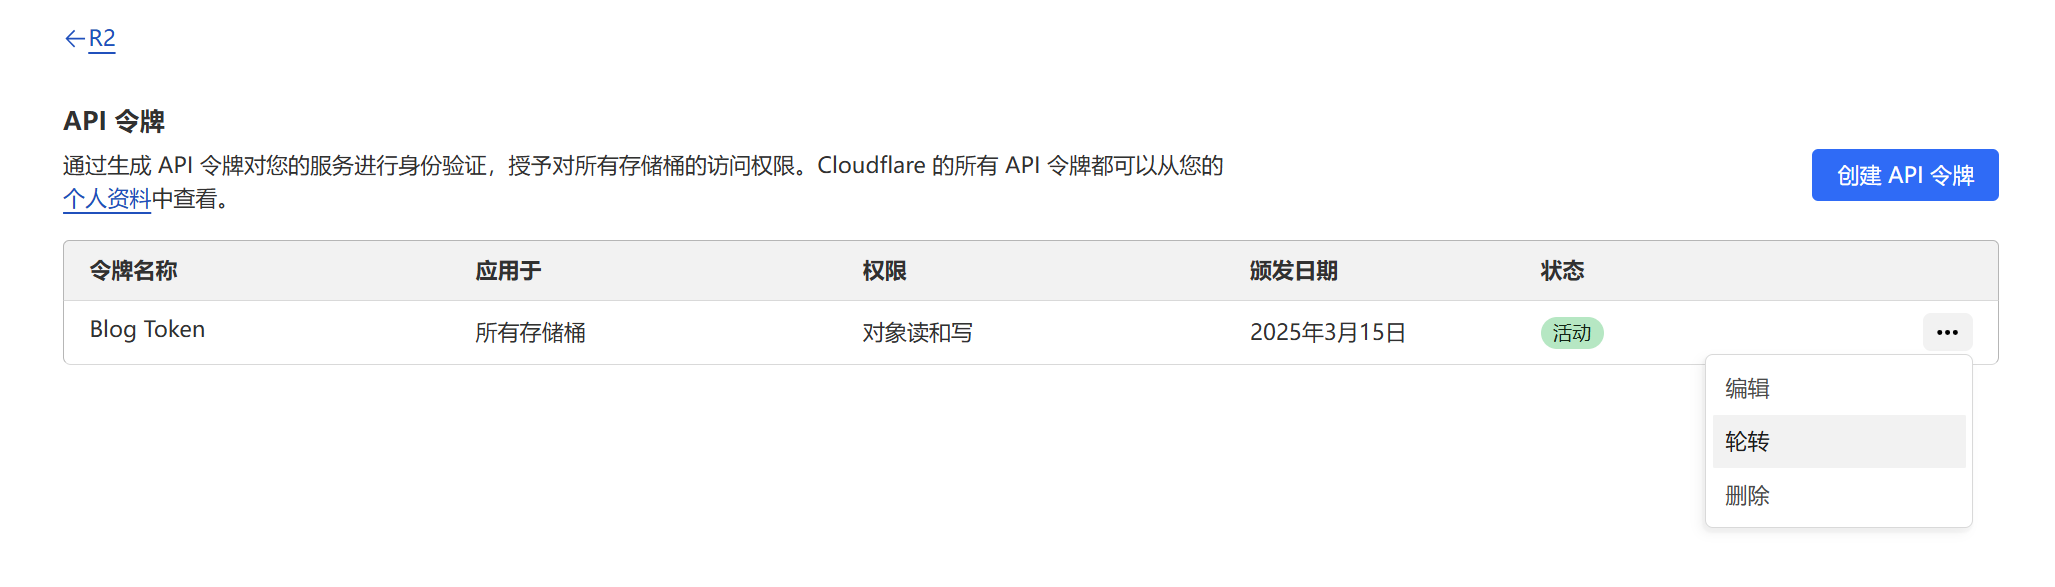
- R2_ACCESSKEYID、R2_SECRET_ACCESSKEY、R2_ENDPOINT:API令牌中查看
- R2_HOST:生成的R2.dev子域 或 自己的域名
- R2_BUCKET:存储桶的名称
令牌信息仅在创建令牌时显示一次,之后无法再次查看,如需查看只能选择轮转重新生成令牌信息。
本博客所有文章除特别声明外,均采用 CC BY-NC-SA 4.0 许可协议。转载请注明来源 Yu的炼金工房!
评论